الخميس، 17 أبريل 2008

how to install xp on mac machines

How do I install Windows XP on my Mac with Parallels Desktop?

Parallels Desktop and how to install it and how to use it so you can run Windows in parallel with Mac OS X? .


I have to admit, I’ve been using Macs since the digital stone age and still get frustrated that I have to buy PCs so I can run Windows with any decent results. I’ve run Microsoft’s Virtual PC, for example, but it’s a dog and even when you have lots of patience it’s pretty difficult to work within that environment even if you have the most powerful computer and least demanding application.

Further, I think that Apple’s Boot Camp program is incredibly smart and have been dual booting Macs for quite a while, though usually into different flavors of Linux or related. I even had my tri-booting Mac laptop make it to the cover of a Linux magazine!

Still, though, the idea of running Windows — or another OS — within Mac OS X through what’s called a "virtual machine" or "virtualization" solution, is too good to miss. That’s why I was thrilled when Parallels released its Parallels Desktop, a full Windows-capable virtualization package for less than $80. Nice!

Just like with Apple’s Boot Camp, there are some specific requirements that you need to meet before you can use Parallels Desktop, however, chief among them the requirement that you have an Intel-based Macintosh. You’ll also want at least a few gig of free disk space and at least 1GB of memory for performance reasons. They also recommend you have the very latest version of Mac OS X, which is easily done with the Software Update capability on the Macs.

Let’s Get Started!

Your first step isn’t to download the application, believe it or not, but rather to decide whether you want to get a free 15-day product key or go ahead and buy the program and get a full product key. I suggest the latter, honestly, because it’s very cool and well worth the money. Now, download Parallels Desktop.

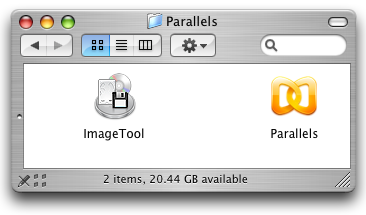
Once you get the 23MB disk image, open it up and you’ll see a pretty typical set of icons:

Parallels, Finder View

Don’t just click on the installer, however. Spend a few minutes reading through the User Guide included to double-check that everything’s compatible with your configuration. Then you’ll find that the installer is quite typical of Mac installers, with a license to accept, a hard disk to select for the installation target, and a few buttons to click. It’s so typical I’m not going to even include a screenshot here!

Once the installation is finished, it’s time to start the application, which you’ll find in a folder called "Parallels" in your Application directory. Click on the program and you’ll see a rather intimidating first screen:

Parallels, Untitled Virtual Machine

Don’t panic. Instead, click on the "New VM…" button on the bottom left to launch the New VM Wizard. (VM = virtual machine, remember).

Parallels, New Virtual Machine Wizard

This will help you through the steps necessary to create a new "virtual" computer that will let you install the operating system of your choice, Microsoft Windows XP.

Your first decision will be to determine if you want to create a typical VM, create a custom VM, or create a blank VM:

Parallels, New Virtual Machine Wizard 2

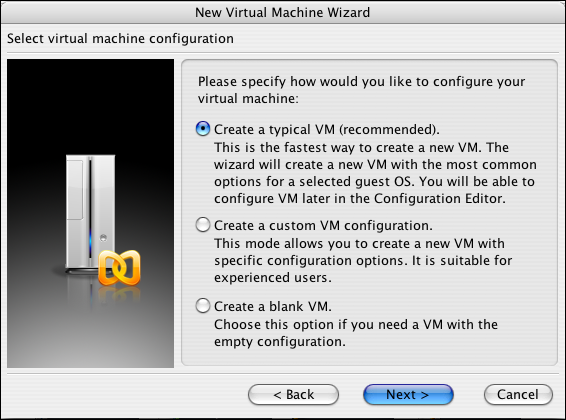
As the wizard recommends, I also encourage you to choose the default configuration. It’s easy to tweak things afterwards, after all.

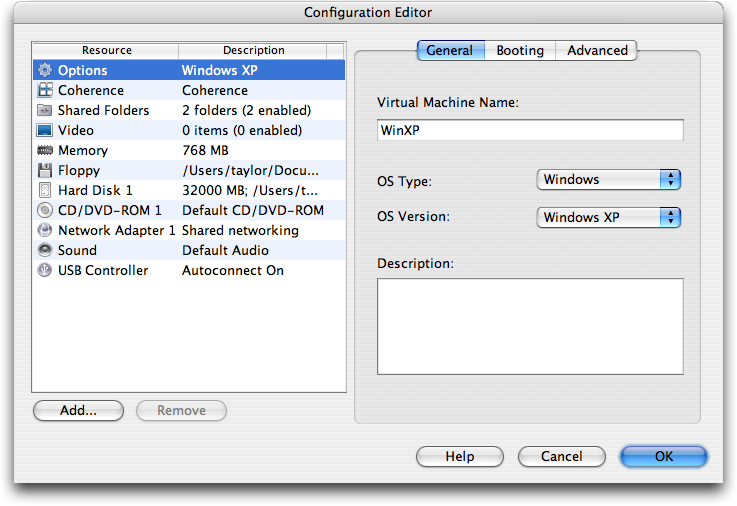
Since we’re doing a default configuration, we need to specify the OS type and version:

Parallels, New Virtual Machine Wizard, SPecifying a Guest OS

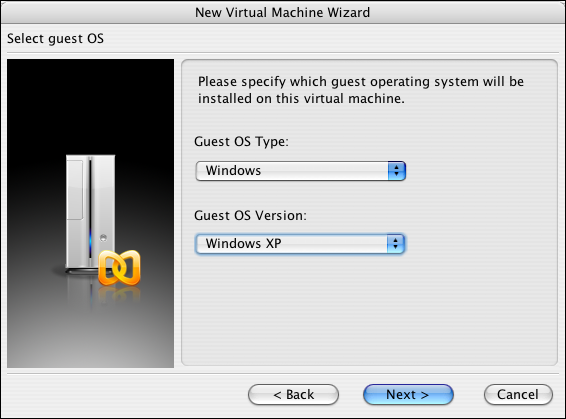
Poke around here a bit, you’ll be astonished at the number of different operating systems the Parallels Desktop supports!! Oh, and not to state anything too obvious, but remember that these are just default preferences. You still need the OS itself for installation.

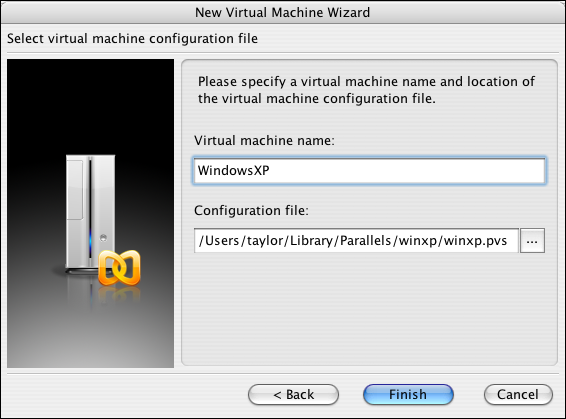
Almost done with the Wizard.

You need to specify the name of your virtual machine, and where it should be stored on your disk:

Parallels, New Virtual Machine Wizard, VM Name

Since this is your first VM, Parallels will need to create some directories too, as you’ll quickly learn:

Parallels, New Virtual Machine Wizard, Directory Doesn't Exist

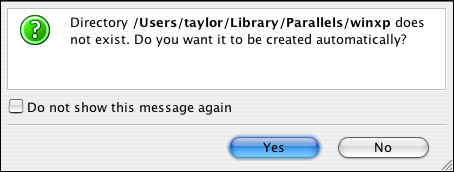
No worries. Click "OK" and the virtual machine for Windows XP will be created and ready to install.

Ready to Install

Ah, well, we’re almost ready to install, as you can now see when you quit the Wizard and get back to the main Parallels Desktop view:

Parallels Startup View

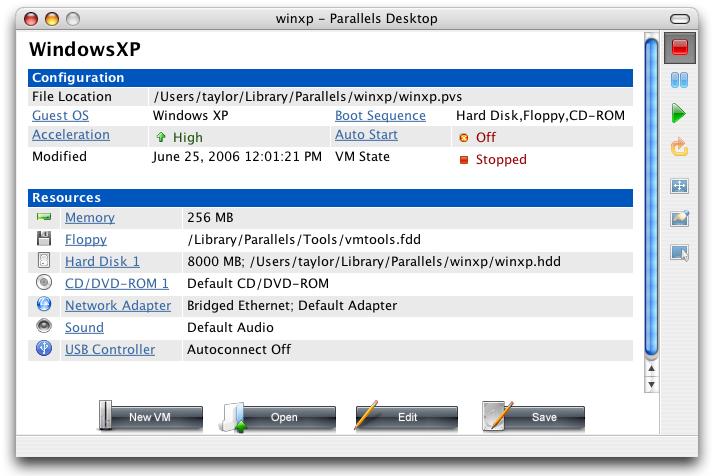
What’s wrong? Too little memory (RAM) allocated for my tastes. Easily fixed, by clicking on the word "Memory", which takes you to the darn useful Configuration Editor:

Parallels VM Configuration Editor

Slide the control along to the recommended amount (or more, your call), and we’re finally ready to roll!

Installing Windows XP, Really

The first step to actually installing an OS is to insert the Windows install CD (DVD, actually) into your computer, then push the "play" button (rightward-facing triangle) in Parallels to start up the program with the new VM system. The system will prompt for a Parallels Desktop license code (which you did remember to request, right?). Enter that, and after a minute or two, your screen will look like this as you’re welcomed to the Windows XP Setup program:

Parallels - Windows XP - Welcome to Setup

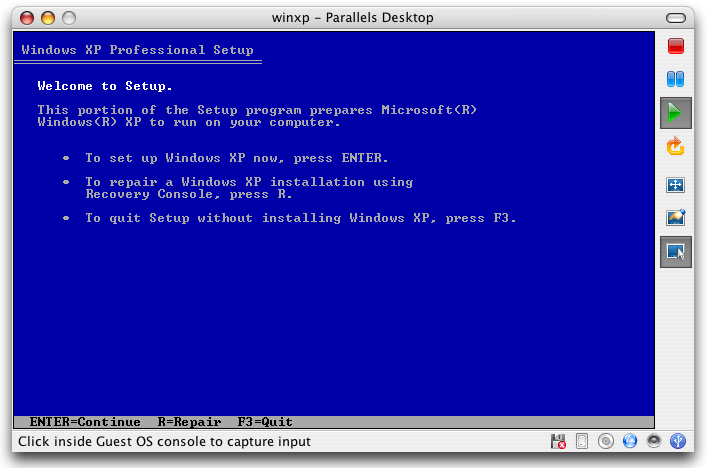
This should already seem pretty cool if you’re a Mac person, because this is running within Mac OS X, yeah!

Now you can step through the standard steps of a Windows XP install in fairly short order:

Parallels - Windows XP - Partition Choices

You can work with the one unpartitioned space as-is, and when you get to the next screen I recommend you choose NTFS rather than FAT so that you have a higher performance Windows virtual machine. Note, however, that FAT is the file system that Mac OS X can more easily navigate if you want to actually access files within the Parallels virtual partition.

Continuing along…

Parallels - Windows XP - An Exciting New Look!

Somehow, "exciting new look" probably isn’t intended to refer to the fact that we’re installing Windows XP within the Mac OS X environment, but it’s amusing nonetheless, isn’t it?

At this point you’ll go through some rudimentary Windows XP configuration questions, about language, region, and related. Finally, you’ll hit the second of the legal interludes in this process:

Parallels - Enter Windows XP Product Key

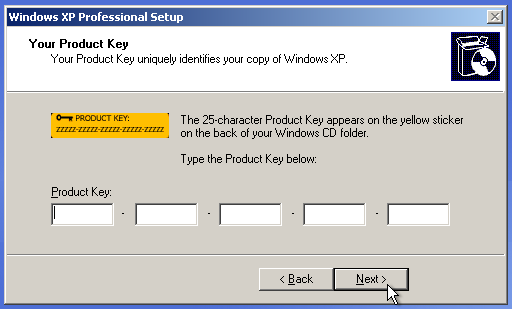
If you don’t have a valid product key for Windows XP (or whatever OS you’re installing) you’ll be stuck here, though you can try running for the 30 days allowed before you have to register your OS product.

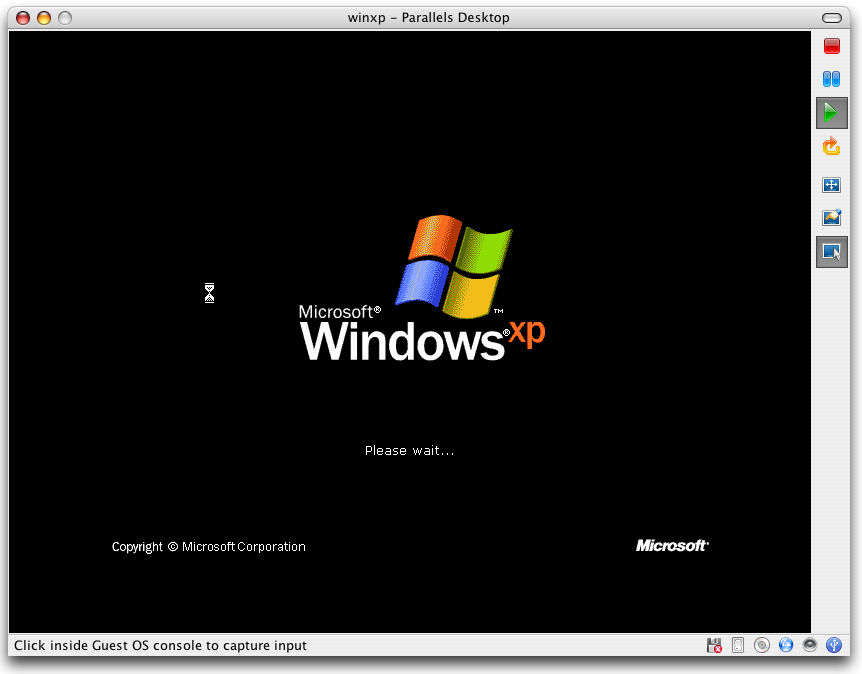
A few more simple configuration options about timezone, current date and time, and you’re finally into the installation phase of Windows XP, which can take anywhere from 30 minutes to a few hours. I don’t have the patience to time it, so I’m not sure. Instead, it’s a great time for a chai break at Starbucks :-)

When I come back, Windows is mostly installed and it’s just a matter of specifying a few more configuration changes. One thing that happens is that the virtual machine reboots itself and then automatically adjusts the screen resolution to escape the 640x480 hell that we were confined to for the initial installation process. Now we get a glorious Windows logo and boot screen within Parallels Desktop itself:

Parallels - Windows XP - Automatically Adjusted Screen Resolution

Now you need to do just a wee bit more Windows configuration, including what I consider a critical step:

Parallels - Windows XP - Protect Your PC with Automatic Updates?

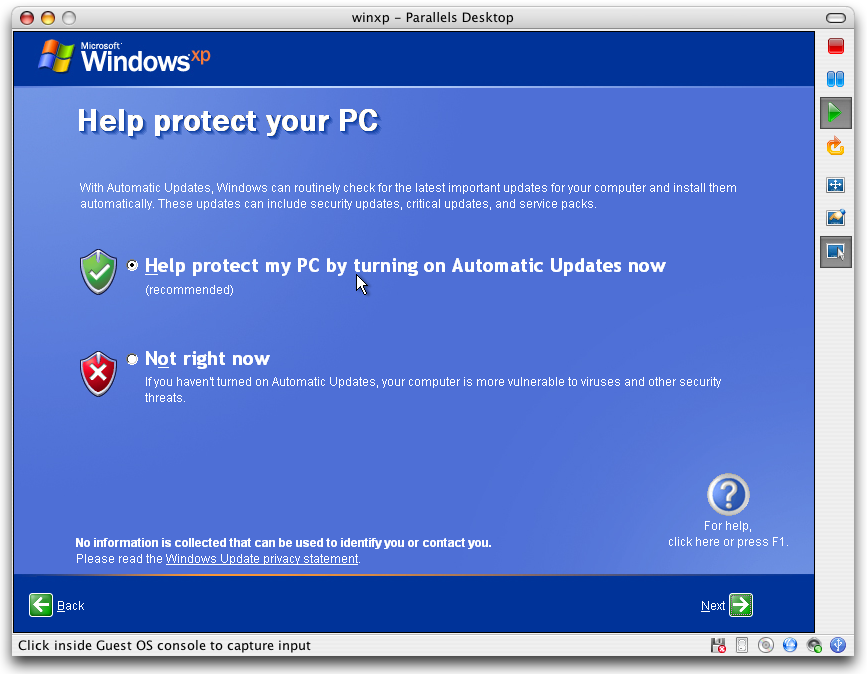
You always want to select "automatic update" unless you’re a complete Windows guru and know exactly what you’re doing.

Next you’ll need to indicate if you want to register your version of Windows XP with Microsoft. If you’re going to use this for a long period of time, you might as well do that. Otherwise, select "no" and you’ll be reminded later when you’re perhaps ready to do so.

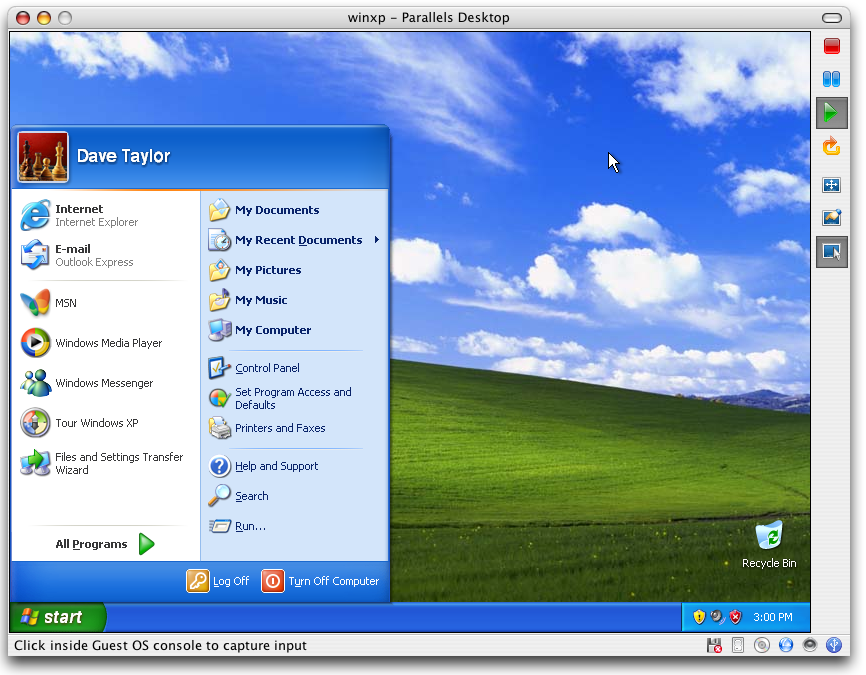
That’s basically all there is to it. We’re done. In just a few seconds Windows XP reboots and you end up with the familiar background screen, task bar, START button, and much more. All within the world of Mac OS X. Sweet indeed:

Parallels running Windows XP within Mac OS X

It’s not quite as snappy as Apple’s Boot Camp, as I’d expect, but it’s certainly a big improvement over the old sluggish world of Virtual PC.

That should get you going with Parallels Desktop. Questions? You might want to check out the Parallels Blog or pop into the Parallels Forum where users and developers compare notes.

Hope you’re up and running. I know that I’m delighted to have Parallels Desktop on my computer, finally.

Oh, and once you do have it running, don’t forget to also install Parallels Tools, a must-include package of utilities. Learn how here: Install Parallels Tools on Intel Mac.

الاثنين، 24 مارس 2008

Problem with my notebook hdd, and i can 't install os on it

Ask : After i formatted my laptop, notbook hdd and partationed it i can not access the hdd and givin me error message that it can not access my hdd, or no hdd available , please help me in this
regard
Answer : pls enter the setup page of your nootbook and you will in the advanced optoions a choice to choose one in between named as sata hdd either disabled or enabled , you will choose to disable it, or if it ask you to choose in between ata or sata, you have to choose ata, then after this you will be able to install your os after this.

السبت، 22 مارس 2008

How To Integrate Floppy SATA RAID Driver into Windows XP CD

If you have a newer versions of laptops, those in it's setup you can't choose in between ata or sata ard disks you will be facing alot of troubles in installing Windows XP
You will need to download a floppy SATA RAID driver, extract it to floppy disk and then when installing XP, you need to press F6 to install the RAID driver
However, newer desktop computers and laptops doesn’t come with floppy drive
It’d be a waste to buy an external USB floppy drive just to use to install Windows XP
In order not to use floppy drive, you can integrate the floppy SATA RAID driver into Windows xP CD
This way, you can install Windows XP on a SATA hard drive without using floppy
You’ll need to have XP CD or the source files (i386) on your computer, the floppy SATA RAID driver which can be downloaded from the motherboard manufacturer’s website and a CD/DVD writer
Most new computers already comes with a CD write
Here are the steps .
Download and install nLite
download SATA driver from manufacturer website and extract it to a new folder
Run nLite and select the language that you want to display in nLite
. Specify the Windows XP installation files. If there is a i386 folder at the root of your drive
most probably that can be used. If not, enter your XP CD and browse your disc drive lette
Click Next once done

. Click Next again when you’re at Presets
. At Task Selection, click Drivers and Bootable ISO
Click Next

. Now click Insert button, select “Multiple driver folder“, choose the folder with extracted drivers
and click OK
Select the shown drivers to integrate. Do not select 64 bit drivers on a 32 bit Windows XP
Click OK when done selecting the drivers. Click Next

. You’ll need to choose the exact type of hardware and OS if listed. A few textmode integration
options will be listed. You can check the manufacturer’s website to know which chipset is being used. Select the drivers and click OK and then click Next

Click Yes when asked “Do you want to start the process?” The driver integration wouldn’t take more than a minute
Click Next when done.. At the next screen you can create a bootable ISO to burn to CD/DVD, or you can even burn to CD directly using “Direct Burn”

Congratulations! You now have a new Windows XP CD/DVD that contains SATA RAID drivers

how to install xp on hp dx2700

Your notebook hardware is designed to work with only Vista operatingsystem. HP does not recommend Windows XP on this notebook.
HP stronglyrecommends only Vista factory installed operating system on HP latestnotebooks. Your notebook contains latest hardware.
As these components are designed to workwith Vista operating system.
Please create the notebook recovery disks before you proceed with software changes on your notebook.
HP does not assure any Windows XP drivers for latest notebooks.
I personaaly suggest you to go ahead with Vista only.
Here is the webpage to install the windows XP.
http://h10025.www1.hp.com/ewfrf/wc/genericSoftwareDownloadIndex?cc=us&dlc=en&lc=en&softwareitem=ob-51521-1&jumpid=reg_R1002_USEN
Please copy the entire URL and paste it in a new window of InternetExplorer. Then open the link from

how to install xp on hp notebook dv2000

Your notebook hardware is designed to work with only Vista operatingsystem. HP does not recommend Windows XP on this notebook.

HP stronglyrecommends only Vista factory installed operating system on HP latestnotebooks. Your notebook contains latest hardware.

As these components are designed to workwith Vista operating system.

Please create the notebook recovery disks before you proceed with software changes on your notebook.

HP does not assure any Windows XP drivers for latest notebooks.

I personaaly suggest you to go ahead with Vista only.


Please copy the entire URL and paste it in a new window of InternetExplorer. Then open the link from there.

الخميس، 20 مارس 2008

hp dv6312 xp drivers

(1)
Click on the below links to download the drivers and install the drivers in the same
sequence.
NVIDIA GeForce Series Video Driver for Windows XP..
(2)
NavIDIA nForce Chipset Driver and Network Controller for
Windows XP
Note:this package provides the driver for the NVIDIA nForce Chipset andNetwork
Controller
(3)
UAA drivers to enable the audio hardware for Windows Xp
Note: It is strongly
recomended to install this driver before you installthe audio driver. If you do
notinstallthis driver the audio will notwork
(4)
Conexant High Definition Audio Driver for Windows XP.
(5)
Conexant HDAUDIO Soft Data Fax Modem driver for
windows XP.
(6)
.Broadcom Wireless LAN Driver for Windows XP.
(7)
. HP Quick Launch Buttons for Windows XP.
(8)
. Ricoh 5-in-1 Card Reader Driver for Windows XP.
(9)
.Software and Drivers for HP Integrated Module with Bluetooth Wirelessfor Windows
XP.
(10)
HP Pavilion Webcam Driver for Windows XP.

hp pavilion dv6000 xp drivers

Click on the below links to download the drivers and install the drivers in the same sequence.
1
NVIDIA GeForce Series Video Driver for Windows XP..
2.
NVIDIA nForce Chipset Driver and Network Controller for Windows XP.Note: This package provides the driver for the NVIDIA nForce Chipset
andNetwork Controller
3.
UAA drivers to enable the audio hardware for Windows XP.Note: It is strongly recomended to install ths driver before you installthe audio driver. If
you do not install this driver the audio will notwork. ftp://ftp.hp.com/pub/softpaq/sp33501-34000/sp33867.exe
4.
Conexant High Definition Audio Driver for Windows XP. ftp://ftp.hp.com/pub/softpaq/sp34001-34500/sp34200.exe
5.
Conexant HDAUDIO Soft Data Fax Modem driver for windows XP. ftp://ftp.hp.com/pub/softpaq/sp33501-34000/sp33742.exe
6.
Broadcom Wireless LAN Driver for Windows XP.
7.
HP Quick Launch Buttons for Windows XP. ftp://ftp.hp.com/pub/softpaq/sp33001-33500/sp33258.exe
8.
Ricoh 5-in-1 Card Reader Driver for Windows XP. ftp://ftp.hp.com/pub/softpaq/sp33001-33500/sp33413.exe
9
Software and Drivers for HP Integrated Module with Bluetooth Wirelessfor Windows XP
10.
HP Pavilion Webcam Driver for Windows XP. ftp://ftp.hp.com/pub/softpaq/sp35001-35500/sp35414.e

compaq presario 2100 xp drivers

you are welcome Here are the links to download the drivers for your notebook:
Here
is the link for downloading the Video driver
NOTE: Clicking on the link may not open the web page. Copy the link and Paste it in
the Internet Explorer address bar and Press Enter.
Here is the link for downloading the Audio driver
Here is the link for downloading the Modem driver
Here is the link for downloading the Network card driver
Here is the link for downloading the Easy Access button software
Here is the link for downloading the Touchpad Drivers
Here is the link for downloading the Wireless driver
NOTE: Clicking on the link may not open the web page. Copy the link and Paste it in
the Internet Explorer address bar and Press Enter. Here is the link for downloading
the Chipset Drivers
: